 At Bliss Home Care Services we are all for finding natural and sustainable ways to make our world and our environment a safer and healthier place to live. One place to start is to make small changes in our home and everyday life. This blog is dedicated to eliminating cling wrap which is harmful to human health and ends up in landfill and in our oceans. We’re going to share how easy it is to make your own reusable bees wax wraps to replace cling wrap.
Bees wax wraps are a safe and healthy alternative to cling wrap and the best part is that it will reduce the waste each home is producing. According to the most recent statistics from National Waste Report, Australia as a nation produces 64 million tons per year. That equates to approx. 2.7 tonnes of waste every year – that’s right 2.7 tonnes of waste in 365 days! Let’s say no to cling wrap and reducing waste.
Why Is Cling Wrap So Bad?
All plastic products are made up of chemicals and there have been many reports and findings over the years that these chemicals seep into our food and drinks and eventually cause many harmful health concerns.
It’s also a non-recyclable product and ends up in landfill or litter in our streets and eventually finds its way into our beautiful oceans, affecting our environment, wildlife and sea life.
What Is A Safe Alternative?
Firstly, say no to cling wrap and replace it with a safer and healthier alternative – bees wax wraps which are reusable and incredibly easy to make at home.
Given that it’s the beginning of the school holidays here in Melbourne, Australia making your own bees wax wraps to replace cling wrap is a great activity to get the kids involved in. They can make their own colourful, bright and reusable bees wax wraps that the whole family can use in 4 easy steps. All you need are 6 items and you have a whole lot of fun ahead of you!
What You Will Need
Step 1
Preheat oven to 180 degrees Celsius. Place your bees wax bar in an oven proof container and insert into the oven until it’s completed melted. This normally only takes 5-10 minutes. Do not use a microwave to melt the bees wax.
Step 2
Place an old towel or blanket on a flat surface to protect your surface. Cut out squares or circles from your sheets of baking paper and cotton fabric.
You can make a variety of sizes to suit different sized bowls and for sandwiches. Ensure you cut the baking paper a little larger than the fabric for any overflow and drizzles.
Step 3
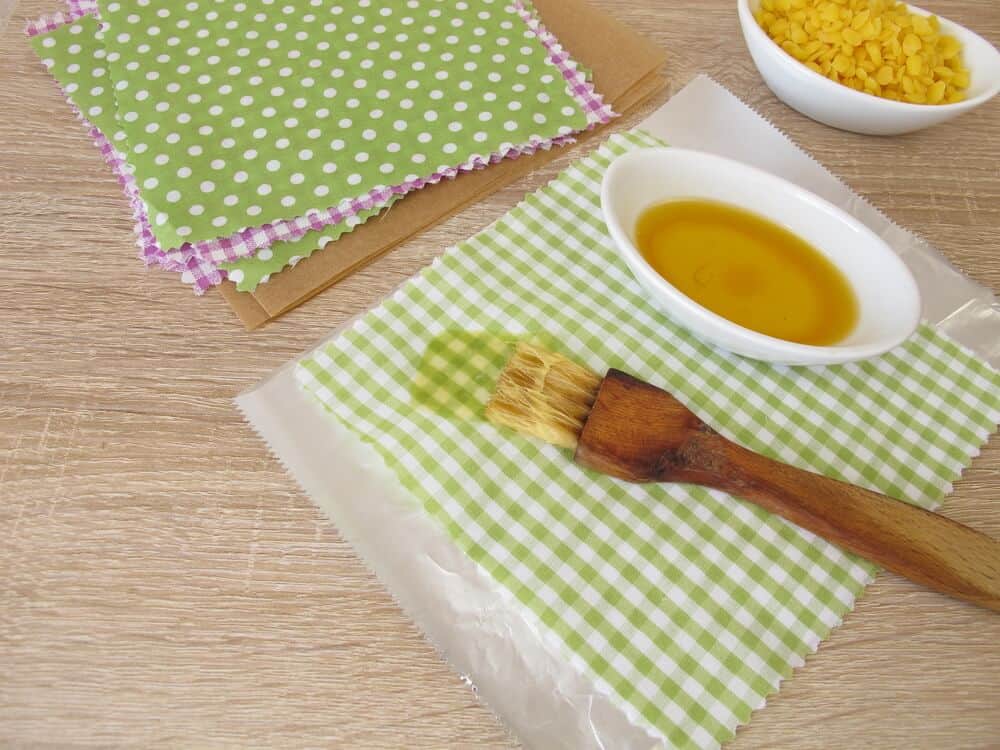
Dip your brush into the melted wax and paint it onto the fabric squares with a small clean brush or pastry brush. Start at the top and work your way to the bottom to ensure a smooth and even coverage.
Just a small amount of the wax is sufficient, don’t use too much wax on the fabric as this will cause it to crack. Turn the fabric over gently and repeat on the other side.
If you’ve used a thin fabric, the melted bees wax may have seeped through to the other side to coat the entire fabric.
Repeat this process until you’ve used all the beeswax and fabric.
Step 4
Once both sides of the fabric has been evenly coated and you’re happy with the bees wax wrap, lift the corners from the baking paper gently and hang it to dry.
And there you go, you have made your very own bees wax wraps! Just remember that they are not air-tight so we do recommend using them to cover foods that will be eaten within a day such as sandwiches, a bowl of food or fruit. It is not recommended to use them on perishable items such as fresh meat, fish or poultry.
You can simply maintain your beeswax wrap by rinsing them clean after use with cold water and mild soap. If you used hot water it would melt the wax. Air dry the wrap on your dish rack or on a towel on a flat surface. They can be reused time and time again.
Help to spread the word on how easy it is to make small changes to make a big difference. You may also be interested in reading our article Reduce Waste at Home where we share our top five ideas to inspire you to make more changes to your daily habits and further reduce waste at home.